How To Clean A Ruger 1022: Step-by-Step Guide
Cleaning a Ruger 10/22 is essential for maintaining its performance. Regular maintenance ensures it functions smoothly and lasts longer.
The Ruger 10/22 is a popular, reliable rifle beloved by many firearm enthusiasts. Keeping it clean is crucial for its accuracy and longevity. A well-maintained Ruger 10/22 not only performs better but also provides a safer shooting experience. Cleaning your rifle might seem challenging, but with the right steps, it can be straightforward.
In this guide, we will walk you through the process, making it easy to follow and understand. Whether you’re a seasoned shooter or a beginner, our tips will help you keep your Ruger 10/22 in top condition. Let’s get started!
Gather Cleaning Supplies
Before starting the cleaning process, it is crucial to gather all the needed supplies. Having everything ready will make the task easier and faster. Let’s look at the essential tools and recommended cleaning products for your Ruger 1022.
Essential Tools
To clean your Ruger 1022, you will need a few basic tools. Here is a list of the essential tools:
- Cleaning Rod: A flexible rod to clean the barrel.
- Bore Brush: This helps remove dirt from the bore.
- Patches: Soft cloth patches to wipe the barrel.
- Patch Holder: To hold the patches on the cleaning rod.
- Toothbrush: An old toothbrush can clean small parts.
- Screwdriver Set: To disassemble the gun.
Recommended Cleaning Products
Using the right cleaning products ensures the longevity of your gun. Here are some recommended cleaning products:
| Product | Purpose |
|---|---|
| Gun Solvent | Removes carbon and lead deposits. |
| Gun Oil | Lubricates and protects metal parts. |
| Cleaning Pad | Protects your work surface. |
| Microfiber Cloth | Wipes down the gun without leaving lint. |
With these supplies, you are ready to clean your Ruger 1022. Proper cleaning will keep your gun in top condition.
Prepare Your Workspace
Before you start cleaning your Ruger 1022, it’s crucial to prepare your workspace. A clean and organized area ensures safety and efficiency. In this section, we will guide you on how to choose the right area and set up your workspace effectively.
Choosing The Right Area
Select a well-lit and spacious area. Good lighting helps you see small parts clearly. Ensure the space is free from distractions. A quiet environment reduces the risk of accidents. Opt for a flat and stable surface, such as a workbench or sturdy table. This prevents your tools and firearm from tipping over.
Setting Up The Workspace
Gather all necessary cleaning supplies before you begin. This includes cleaning rods, brushes, patches, solvent, and oil. Lay out a protective mat or old towel on the work surface. This catches any spills and prevents scratches. Keep a trash can nearby for used patches and other waste.
| Item | Purpose |
|---|---|
| Cleaning Rod | Used to clean the barrel |
| Brushes | Remove carbon and residue |
| Patches | Apply solvent and oil |
| Solvent | Breaks down gunpowder residue |
| Oil | Lubricates moving parts |
Arrange your tools and supplies within easy reach. This minimizes the need to move around, maintaining focus on the cleaning process. Ensure your workspace is well-ventilated. The fumes from solvents can be harmful if inhaled.
By preparing your workspace properly, you set the stage for a smooth and safe cleaning session. This preparation helps you stay organized and focused, reducing the risk of errors.
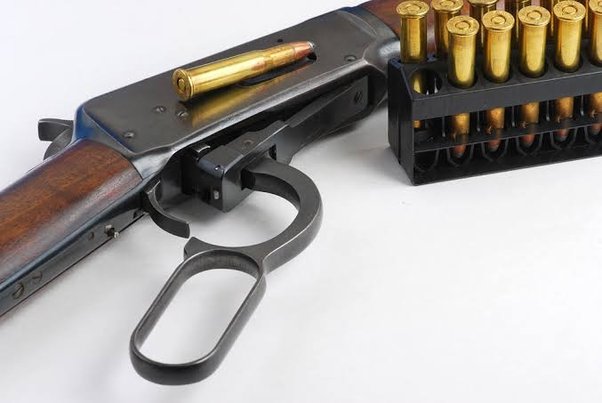
Unload The Rifle
Cleaning your Ruger 1022 starts with a crucial step: unloading the rifle. This ensures safety and prevents accidents. Follow these steps to unload your Ruger 1022 correctly and safely.
Checking The Chamber
Begin by pointing the rifle in a safe direction. Ensure your finger is off the trigger. Pull back the bolt to check the chamber. Look inside to see if there is a round in the chamber. If you see a round, remove it carefully. Double-check the chamber to confirm it is empty.
Removing The Magazine
Next, locate the magazine release button. Press the button to release the magazine. Pull the magazine out of the rifle. Place the magazine in a safe place. Always double-check the chamber after removing the magazine. Ensuring both the chamber and magazine are empty is vital for safety.

Credit: www.instructables.com
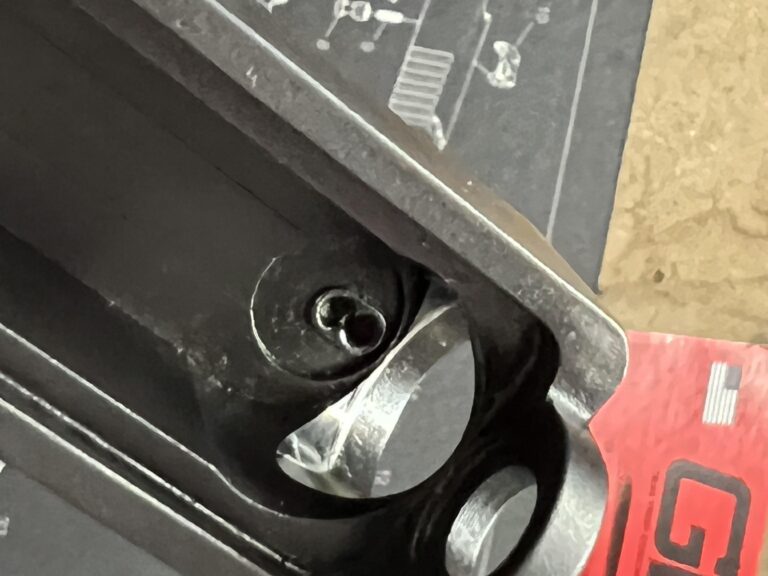
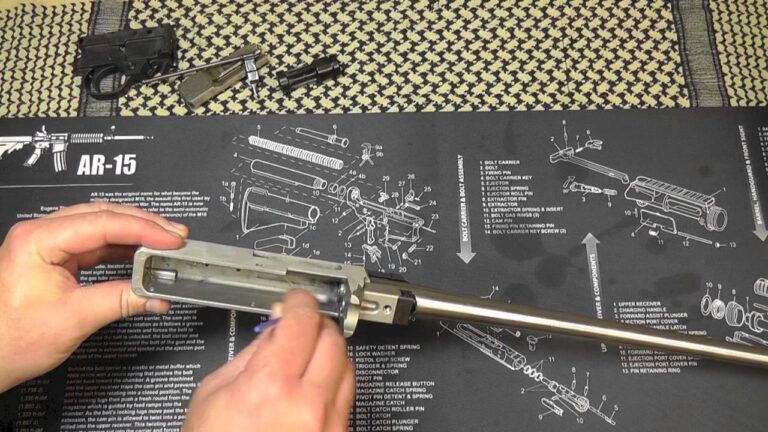
Disassemble The Ruger 1022
Disassembling your Ruger 1022 is an important step in cleaning it. You need to break down your rifle into its components to ensure thorough cleaning. Follow these steps to disassemble your Ruger 1022 safely and effectively.
Removing The Barrel
First, ensure your Ruger 1022 is unloaded. Safety first. Then, remove the magazine. Use the bolt handle to pull the bolt back and check the chamber. Confirm it’s empty.
Next, locate the barrel band screw. Use a screwdriver to loosen and remove it. Then, take off the barrel band. Now, find the stock screw. Loosen it and carefully lift the barrel from the stock.
Set the stock aside. Pay attention to the parts as you remove them. This will help you reassemble the rifle later. The barrel is now free from the stock.
Taking Apart The Bolt Assembly
With the barrel removed, focus on the bolt assembly. Pull the bolt handle back and push out the bolt stop pin. This will release the bolt assembly.
Next, remove the bolt handle and spring. Carefully take out the bolt from the receiver. Keep track of these small parts. They are essential for reassembly.
Now, you have successfully disassembled your Ruger 1022. Each part is ready for cleaning. Remember to handle each component with care.
Clean The Barrel
Cleaning the barrel of your Ruger 1022 is essential for maintaining its accuracy and longevity. A clean barrel ensures that your rifle performs well and remains reliable. Follow these steps to effectively clean the barrel and keep your firearm in top condition.
Using A Bore Brush
First, use a bore brush to remove any residue and debris. Choose a brush that matches the caliber of your Ruger 1022. Attach the brush to a cleaning rod.
- Insert the brush into the barrel from the breech end.
- Push the brush through the entire length of the barrel.
- Pull the brush back and repeat several times.
This will loosen any fouling and dirt inside the barrel. Ensure that you use gentle, consistent strokes to avoid damaging the rifling.
Applying Solvent
Next, apply a solvent to break down the fouling. Solvents are designed to dissolve lead, copper, and carbon deposits.
- Soak a patch in solvent.
- Attach the patch to the cleaning rod.
- Run the patch through the barrel.
- Allow the solvent to sit for a few minutes.
This process will help the solvent work effectively to dissolve any remaining residue. After the solvent has had time to work, use a clean patch to remove it.
Continue running clean patches through the barrel until they come out clean. This ensures that all solvent and fouling have been removed.
Finally, run a lightly oiled patch through the barrel to protect it from corrosion. This step is crucial for maintaining the integrity and longevity of your Ruger 1022.
Clean The Action
To ensure your Ruger 1022 performs well, cleaning the action is essential. This step involves scrubbing the bolt and lubricating moving parts. Proper cleaning will improve accuracy and longevity.
Scrubbing The Bolt
First, remove the bolt from the rifle. Use a nylon brush to scrub the bolt. Focus on removing built-up carbon and debris. Ensure you clean all sides of the bolt.
- Scrub the extractor area
- Check the firing pin channel
- Remove any visible dirt
After scrubbing, wipe the bolt with a clean cloth. This removes loosened debris. Inspect the bolt for wear or damage. Replace if necessary.
Lubricating Moving Parts
Apply a small amount of lubricant to the moving parts. Focus on areas where metal contacts metal. Ensure you do not over-lubricate.
- Lubricate the bolt rails
- Apply oil to the bolt handle
- Lubricate the firing pin
Use a high-quality gun oil for best results. After lubrication, cycle the action several times. This ensures even distribution of the lubricant.
Reassemble The Ruger 1022
After cleaning, reassemble your Ruger 1022 with care. This ensures it functions properly. Follow these steps to reassemble it correctly. Pay attention to detail. Your rifle will be ready for use.
Reattaching The Barrel
First, secure the barrel to the receiver. Align the barrel with the receiver. Slide the barrel into place gently. Ensure the barrel fits snugly. Tighten the barrel screw firmly. Avoid over-tightening. Check the alignment once more. The barrel should be secure and straight.
Reinstalling The Bolt Assembly
Next, reinstall the bolt assembly. Insert the bolt into the receiver. Align it with the guide rails. Slide the bolt smoothly into place. Ensure the bolt is fully seated. Reattach the bolt handle. Check the movement of the bolt. It should slide back and forth easily.
Once the bolt assembly is in place, test the bolt action. Pull it back and release. It should move smoothly. Your Ruger 1022 is now reassembled. Proper reassembly ensures reliable performance.

Credit: www.instructables.com
Final Inspection
After cleaning your Ruger 1022, it’s crucial to conduct a final inspection. This ensures everything is in order and the firearm is safe to use. The final inspection involves checking for cleanliness and ensuring proper function.
Checking For Cleanliness
First, examine the barrel. Look inside to ensure there is no residue. Use a flashlight if needed. Make sure the barrel is shiny and free of debris. Next, inspect the bolt and receiver. These areas often collect grime. Check them carefully. Wipe away any remaining dirt with a clean cloth. Finally, inspect the magazine. Make sure it’s clean and free of obstructions.
Ensuring Proper Function
After cleaning, reassemble your Ruger 1022. Check that all parts fit together correctly. Test the bolt action. It should slide smoothly without resistance. Ensure the trigger works properly. Dry fire the rifle a few times. The trigger should engage and release without sticking. Check the magazine release. It should operate smoothly. Finally, ensure the safety functions correctly. Engage and disengage it a few times to test.

Credit: www.youtube.com
Frequently Asked Questions
How Often Should I Clean My Ruger 1022?
You should clean your Ruger 1022 after every shooting session. Regular cleaning ensures optimal performance and longevity. Neglecting maintenance can lead to malfunctions.
What Supplies Do I Need To Clean A Ruger 1022?
You’ll need a cleaning rod, patches, bore brush, solvent, and lubricant. A cleaning mat and safety glasses are also recommended for a safe process.
Can I Use Wd-40 To Clean My Ruger 1022?
No, it’s not recommended to use WD-40. Use a proper gun cleaning solvent and lubricant designed for firearms to ensure the best care.
How Do I Disassemble A Ruger 1022 For Cleaning?
Begin by ensuring the firearm is unloaded. Remove the barrel band, stock, and receiver. Follow the manual for detailed instructions and safety measures.
Conclusion
Cleaning your Ruger 1022 is easy with the right steps. Keep your gun clean to ensure smooth operation and safety. Regular maintenance extends the life of your firearm. Follow the guide to clean and store it properly. Safe shooting starts with a clean gun.
Enjoy your shooting experience with a well-maintained Ruger 1022. Happy shooting!